A Custom Acrylic Dust Shoe For Stepcraft M-Series CNC Systems
October 18, 2023
This is the 4″ hose edition!
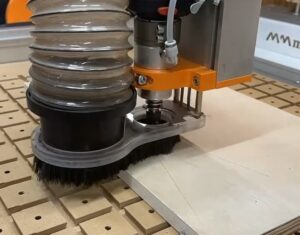
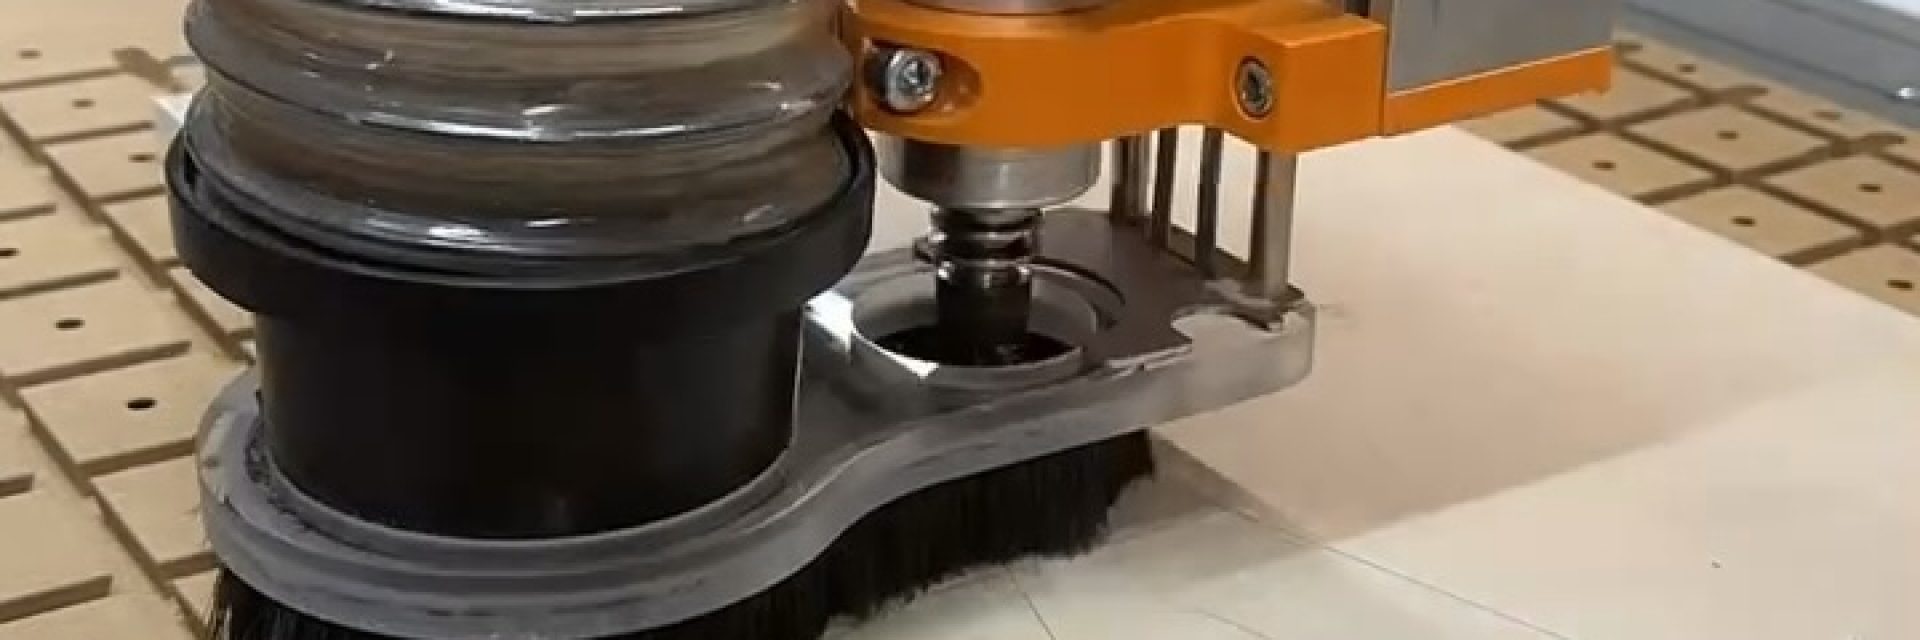
For the Stepcraft Users out there, particularly the M-Series system users with the new “ATC Tool Magazine W/ Dust Boot Control” upgrade, or even the original “Exhaust Adapter” that was originally made for the D-Series, this acrylic version provides an improvement to use a 4″ hose, meaning less clogging and more suction. It’s compatible with the magnetic mounting frame and works well with the pneumatic piston driven feature of the new ATC system that automatically releases the dust shoe at the start of a project and retracts it at the end, and during tool changes.
It was designed to be cut from 1/2″ cast acrylic and assembled from simple, easy to source components. I’ve provided Amazon links (affiliate links that do provide a tiny bit of commission to me just for buying through the links). Of course, you can find comparable products elsewhere but these are the actual parts I used for my own build and are known to work well.
Here are some of the Instagram posts that showcase the dust shoe in action:
https://www.instagram.com/reel/CyiqqpxrqRL
https://www.instagram.com/reel/CrOCTzNsgaZ
https://www.instagram.com/reel/Co7bu5wM4Af
So, let’s start with the shopping list.
NOTE: the links below are Amazon affiliate links that give me a small commission when items are purchased after clicking through the links. I use any funds for R&D (Research & Development, or Rod & Dawn, if you prefer!).
Components Required For Build
- 1/2” Thick Cast Acrylic https://amzn.to/2TxCroh
- 4” Hose Coupler https://amzn.to/3rX3iet
- Brush Striphttps://www.northshorecommercialdoor.com/action-industries-slim-line-flex-brush.html/ (1″ works best for me)
* link updated 1/24/24 due to manufacturer part time, make sure to measure the thickness of the plastic spine (make sure it’s a plastic spine, not metal, when ordering) for the strip and adjust the slot width if necessary. - N52 Neodymium Magnets 1 In X 1/4 In X 1/4 In Bar/Block 3 required: https://appliedmagnets.com
- CA Glue & Accelerator https://amzn.to/3dPSfcJ, https://amzn.to/3wkFzks, ALTERNATE: HOT GLUE GUN KIT https://amzn.to/3dPSfcJ
- Amana Tool 51410-K Spektra Coated SC Spiral O Single Flute https://amzn.to/3dONdNI
Once you have all of the necessary parts, here’s a download link to my Vectric VCarve file. I created this in Aspire but saved as the more common VCarve (V10.5) file format for wider compatibility.
Vectric VCarve 11.5 (.crv) & Aspire 11.5 (.crv3d) Project Files:
https://drive.google.com/drive/folders/1i6bMh1qeJAcTGukFR5dgH92jxkkPYiz8?usp=share_link
The design is straightforward and only a the single end mill is used to carve the shoe from the acrylic.
NOTE: Please read through these instructions before cutting the acrylic and make sure to adjust the depth values for any of the cuts that go all the way through the material as well as the hole diameters used for the magnets. The settings in the project file were set for the parts I selected and the batch of acrylic I used. Depending on any batch variations, or if you source your acrylic and other parts somewhere else, or opt to use different parts, you may need to change various tool path dimensions and settings.
As always, be aware of the proper feeds and speeds, and adjust accordingly for your system set up and configuration.
ASSEMBLY:
(PICTURES COMING SOON)
For hold down during the cutting process, I used painters tape and CA glue. Once the acrylic shoe is cut out, cleaned up and ready for assembly, you’ll need to install the magnets. The magnet holes, the 3 surrounding the spindle opening, are designed for a snug fit with the bar magnets I used. Again, you may need to adjust the cut of the magnet holes to accommodate any differences in the magnets you will be using.
I recommend laying the acrylic shoe on a flat surface with the brush strip groove facing up. Then insert the magnets into the pocket holes so that they are flush with the top surface of the shoe. The eraser end of a pencil makes a good tool for pushing the magnets down into their holes. You can the do a test fit with the magnets in place to make sure the shoe snaps onto the metal mounting plate used with your original dust shoe. The fit of the magnets should be snug enough to hold them in place during this test fitting. The shoe should rest snugly against the metal plate and its clearance holes should allow pass through of the screw and bracket hardware attached to the plate. Once you’ve confirmed the magnets are in place, remove the shoe from the metal mounting plate. Flip the shoe upside down again and put a tiny drop of CA glue around the bottom edges of each magnet. Spray with activator to quickly bond them in place.
For the hose connecter, I’m now using a quick connect style screw adapter since I’ve found it to be the smallest and lightest option. It has a tapered end that allows it to fit snugly into the large hole of the dust boot, allowing you to quickly attach or remove it as needed.
Now comes the challenging part, installing the brush strip. I’ve tried numerous styles of brush strips from different vendors and ended up using a flex backed strip since it fits snugly and provides a good amount of brush rigidity to allow the dust shoe to properly float. If the brush strip is too flexible and the bristles are too long, the brush will bend too much and also could get in the way of the spindle and bit, which isn’t good. I’ve found that the 1″ long bristles work best.
(PICTURES COMING SOON)
You will need to use a small screwdriver or some other type of thin and flat butrigid tool to push the brush strip up into the groove that was cut in the shoe. I recommend starting the insert of the strip at the back part of the slot, the area directly behind where the spindle will pass through. It’s hard to describe the proper technique to accomplish this but I found that a small screwdriver allowed me to slowly guide the strip into the groove as I pushed it along its outside edge, then cut to the proper length to meet your starting point.
Once the brush strip is installed, you can either use CA or hot glue applied at the corner areas of the grooves. It doesn’t need a lot of glue since it should be very snug in the groove already. Apply glue or other adhesive to hole the brush strip in place at your discretion.
Now depending on the overall weight of your shoe when attached to the dust collection hose, and how the hose is supported (I suspend my dust hose with an overhead bungee cord), you may need to adjust the throttle on the new tool magazine with dust boot control for more air pressure to the piston if the release/retract action isn’t as smooth as it needs to be.
(PICTURES COMING SOON)
I will be updating this post to modify or improve the instructions as needed and based on feedback I receive.
~Rod
And now the invevitable legal stuff:
Any DIY and tutorial content provided throughout the MountainMakers.com website and other assets is for informational purposes only. By taking any information or education material from Mountain Makers LLC, you assume all risks for the material covered. You agree to indemnify, hold harmless, and defend Mountain Makers, LLC from any and all claims and damages as a result of any and all of the information covered.


One Reply to “Custom Dustboot for Stepcraft M-Series CNC Systems – 4″ Hose”
Thanks for the plan. I had to make a few changes but got it cut out fine. I have an issue with the brush strip that you recommended. The backing on the strip is metal and does not bend well on the tight curves and ended up cracking the acrylic. Maybe recommend something with a softer spine that is more flexible.
Thanks.